
Publish articles
Create an article, write it in the editor, and publish it. Customers find it in your help center, and the AI uses it to answer them.
Search portal content
Search portal content
Create an article, write it in the editor, and publish it. Customers find it in your help center, and the AI uses it to answer them.
Create an article, write it in the editor, and publish it. Customers find it in your help center, and the AI uses it to answer them.
An article is one answer to one question. Customers read it in your help center. The initdesk AI uses your published articles to answer customers in the AI chat.
The new article opens in the editor as a Draft. Customers can't see it yet.
Click in the body and write the answer a customer is looking for. Then:
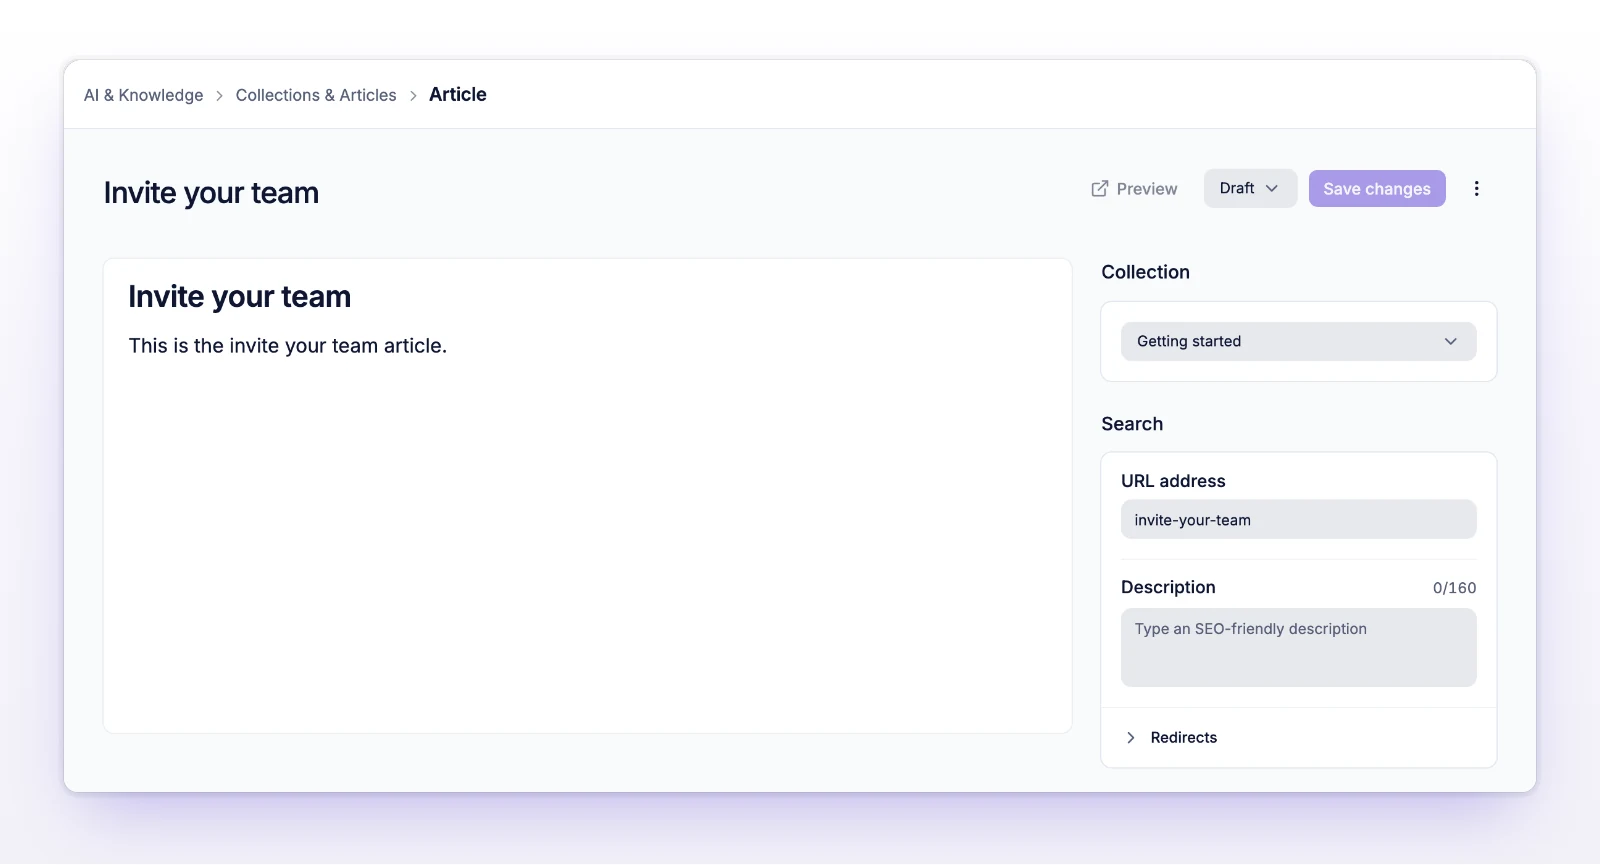
When the article is published, Preview opens it in your help center in a new tab. Before that, Preview isn't available.
You need some content before you can publish or archive. If you try with an empty body, you'll see "Add content before publishing or archiving this article."
| State | Customers see it | The AI uses it |
|---|---|---|
| Draft | No | No |
| Published | Yes | Yes |
| Archived | No | No |
To take an article down without deleting it, set State back to Draft or Archived and select Save changes.
The right side of the article page has two sections.
Collection moves the article to another collection. That changes the article's address, so add a redirect from the old one. See Set up redirects.
Search holds:
Type / on an empty line, or after a space, to open Insert block. Keep typing to filter it, then press Enter. A slash inside a word, like and/or, stays text.
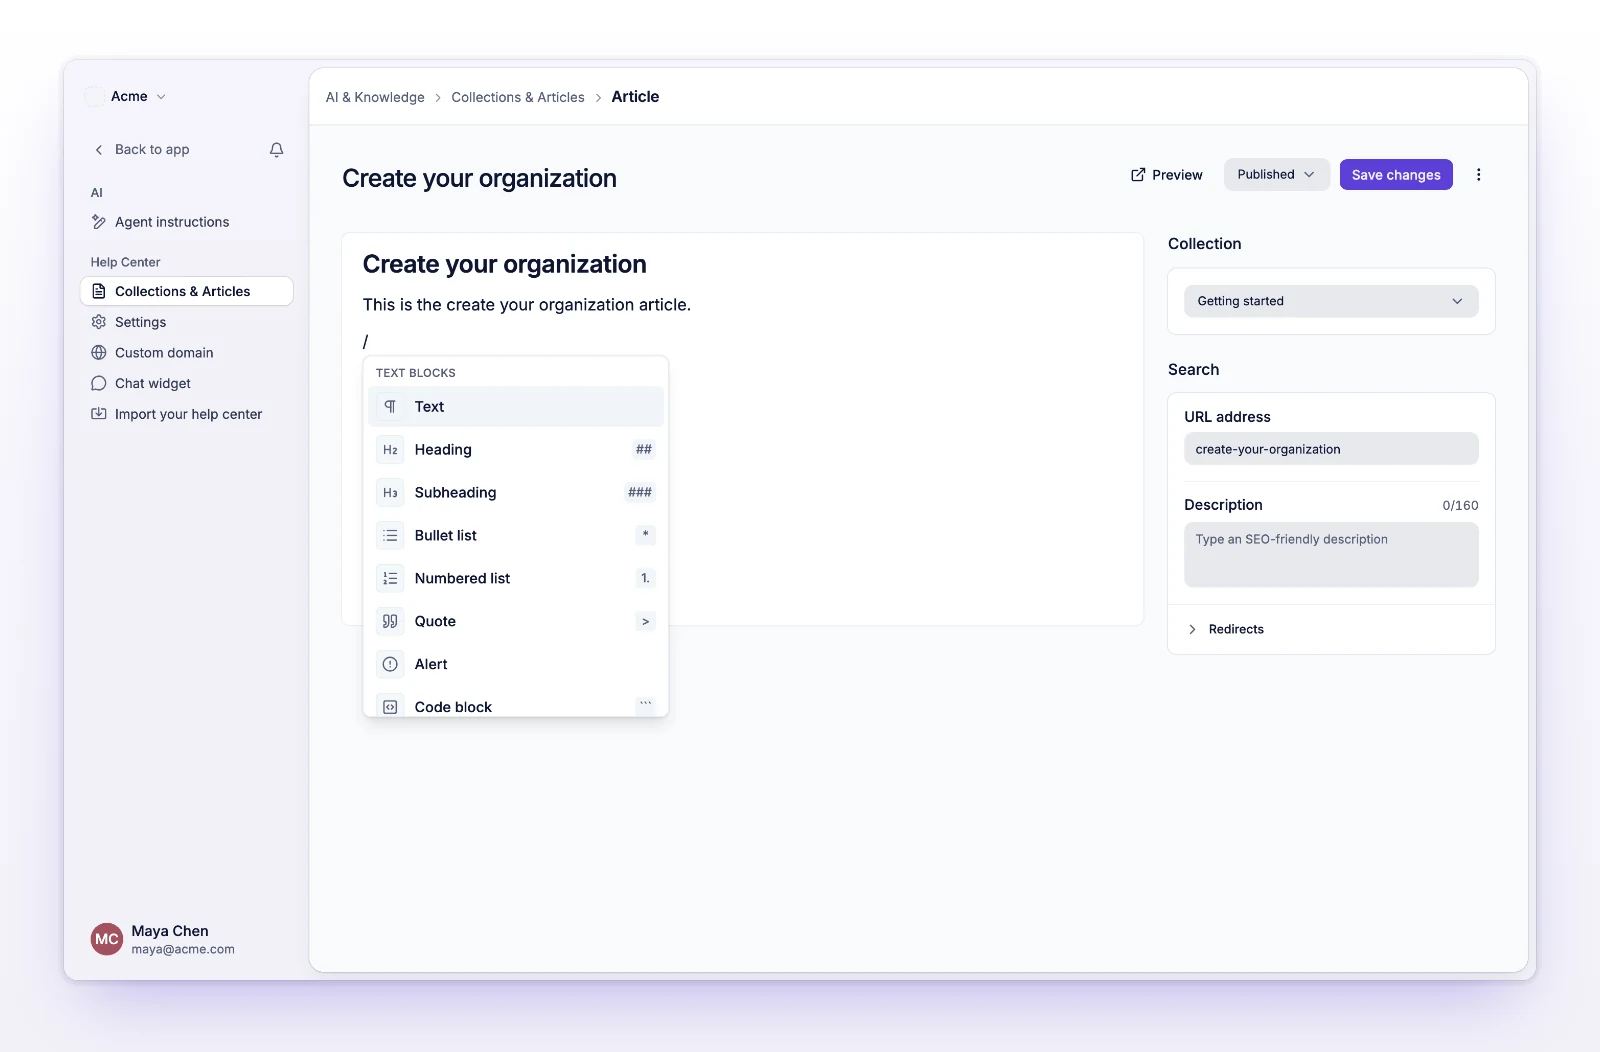
| Block | What it does |
|---|---|
| Text | Plain paragraph. |
| Heading | Section title. Also typed as ##. |
| Subheading | Subsection title. Also typed as ###. |
| Bullet list | Unordered list. Also typed as *. |
| Numbered list | Ordered list, for steps. Also typed as 1.. |
| Quote | Sets a passage apart. Also typed as >. |
| Alert | A callout for a note or warning. |
| Code block | Fenced code, with a language menu. |
| Divider | A horizontal line. |
| Collapsible section | Hides optional details under a title. |
| Image | Uploads a picture. |
| Video | Embeds a YouTube, Loom, or Vimeo video. |
| Table | Rows and columns, with a header. |
The article title is the page's top heading, so headings in the body start one level down. There are two levels: Heading and Subheading.
Select text to open a small menu with Bold, Italic, Strikethrough, Code, and a link button.
An Alert has a type: Info, Success, Warning, Error, or AI. Pick the type from the Alert type menu on the alert. Use them sparingly. One warning that matters is read. Five are skipped.
Give every collapsible section a title. A section without one won't save. You can't put a collapsible section inside another one.
Choose Image, then pick a file.
Add images through Image. The editor has no paste or drag-and-drop upload.
Choose Video, paste the video's address or the whole embed code from Share, and select Add video. Only YouTube, Loom, and Vimeo videos work, and customers watch them without signing in. Videos show at one fixed width, centered.
Choose Table. The first row is the header. You can't drag column widths. On a narrow screen, a wide table scrolls inside the article.
Select text and use the link button (or press Cmd+K on Mac, Ctrl+K on Windows). Links can start with https://, http://, or mailto:.
To link to another article, enter its path from your help center's address, for example /billing/update-card. For an article inside a subcollection, include each collection: /billing/cards/update-card.
Paste Markdown and the editor converts it: headings, quotes, lists, code fences, tables, and dividers. If what you paste came from a web page or a rich-text editor, the editor keeps that formatting instead.
The AI answers from your published articles, the same way a customer reads them. What helps one helps the other.
Look at Top searches in Help center analytics to find the questions your articles don't answer yet.
The article is removed from your help center. Anyone with the old link gets a not-found page. If you only want it hidden for now, set State to Draft instead.
Compress or resize the image, then upload it again.
The file is a different type. Export it as PNG, JPEG, GIF, or WebP.
Another article in this help center uses that URL address. Change it.
Select the empty title on the collapsible section and type one.
Nothing has changed since the last save, or an image is still uploading. Wait for the upload to finish.