
Bring your own data
Bring Your Own Data calls your own API with the customer's email and shows what it returns in the ticket sidebar, with no sync or import.
Search portal content
Search portal content
Bring Your Own Data calls your own API with the customer's email and shows what it returns in the ticket sidebar, with no sync or import.
Bring Your Own Data calls your own API with the customer's email and shows what it returns in the ticket sidebar, with no sync or import.
Bring Your Own Data (BYOD) shows information from your own systems next to each ticket. You give initdesk the address of an API you control. When someone opens a ticket, initdesk sends that API the customer's email, and shows the answer in the ticket sidebar. You see the customer's plan, last invoice, or account status without leaving the ticket.
POST and answers with a JSON object. It must be reachable from the internet. Addresses that point to private or local networks are blocked.https://api.example.com/customers.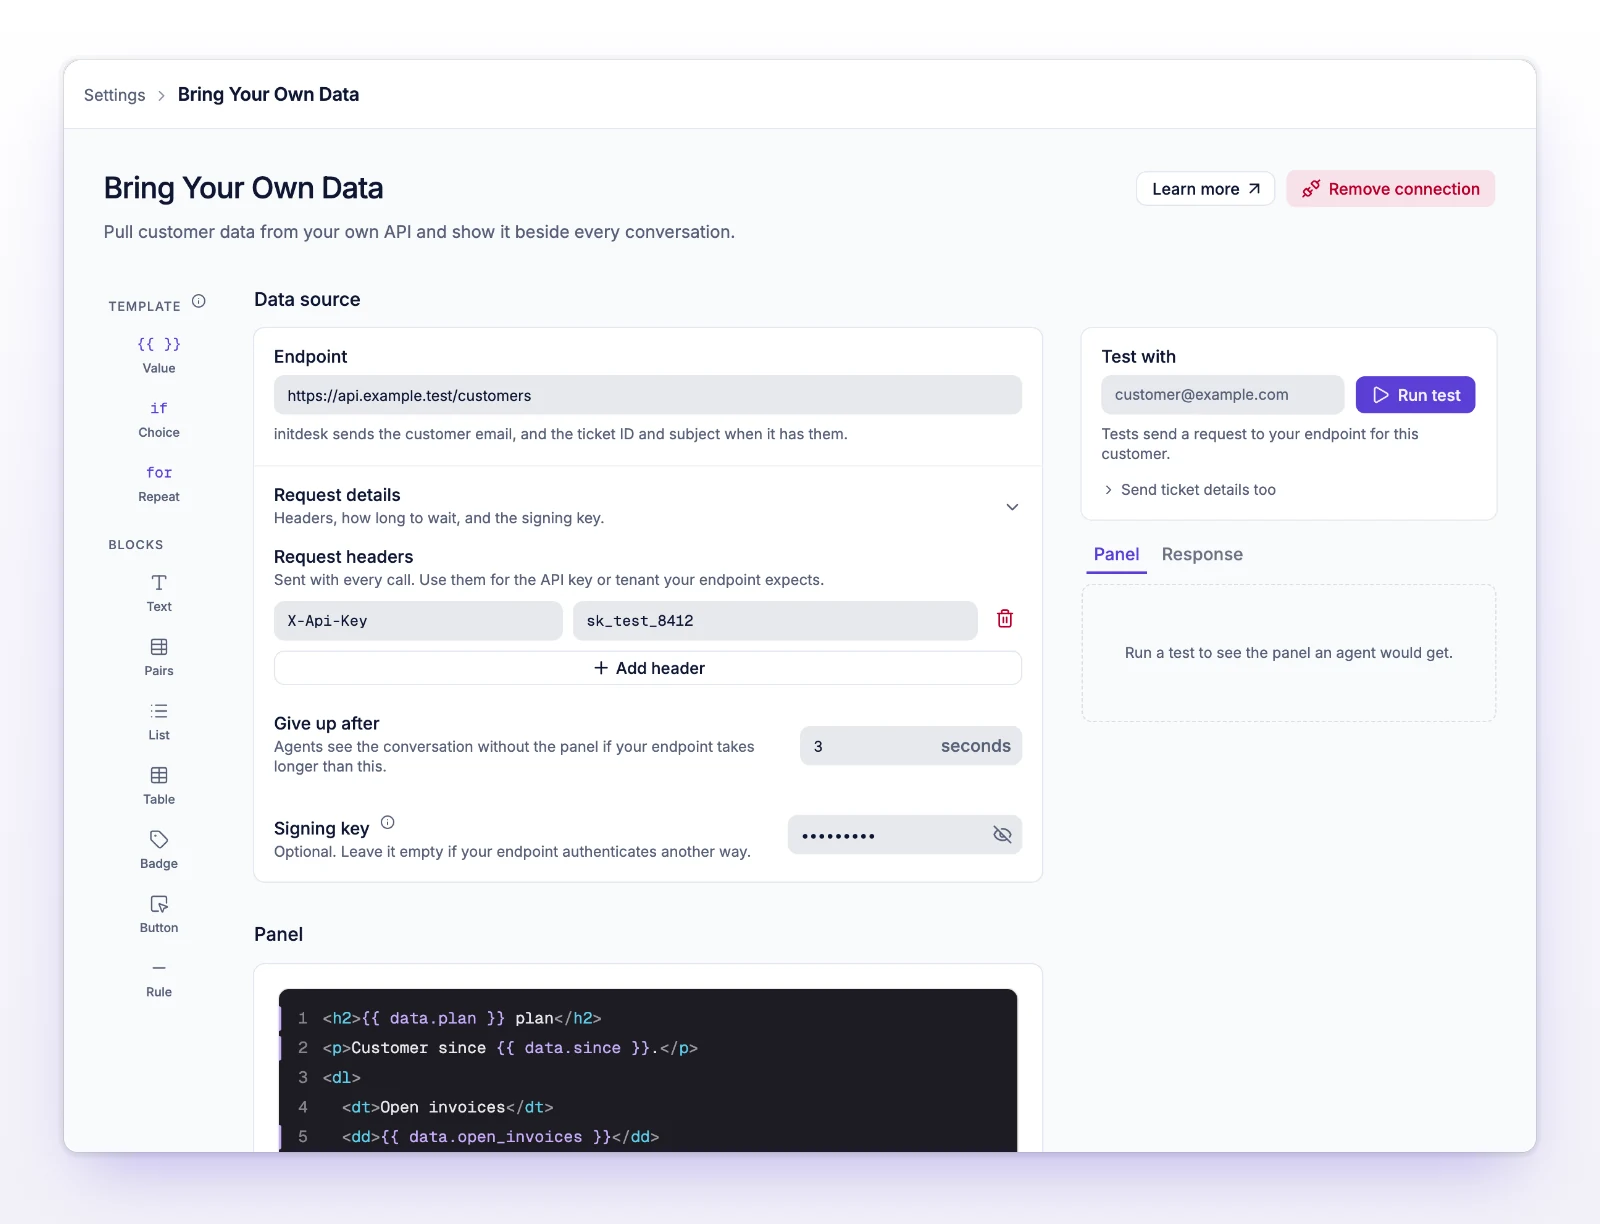
X-Initdesk-Key header on every request. Compare it in your API to confirm the call came from initdesk.The Show in ticket sidebar switch turns the panel on or off without removing your setup.
initdesk sends an HTTP POST with a JSON body and these headers: Content-Type: application/json, Accept: application/json, your own headers, and X-Initdesk-Key if you set a signing key.
{
"email": "customer@example.com",
"ticket_id": 123,
"subject": "Where is my invoice?"
}
| Field | What it is |
|---|---|
email |
The requester's email address. |
ticket_id |
The ticket number. |
subject |
The ticket subject. |
In a test run without ticket details, ticket_id can be 0 and subject can be empty.
Return a JSON object, with a success status code.
{
"customer": {
"name": "Ana Rivera",
"plan": "Pro",
"status": "active",
"renewal_date": "2026-09-12"
}
}
These cause an error instead of a panel:
The template uses Liquid, a simple templating language, to turn the JSON into HTML. Three things are available:
| Variable | What it holds |
|---|---|
data |
Your API's answer. For the example above, data.customer.plan is Pro. |
customer.email |
The requester's email. |
ticket.id and ticket.subject |
The ticket number and subject. |
<dl>
<dt>Customer</dt>
<dd>{{ data.customer.name }}</dd>
<dt>Plan</dt>
<dd>{{ data.customer.plan }}</dd>
<dt>Status</dt>
<dd>{{ data.customer.status }}</dd>
<dt>Renewal date</dt>
<dd>{{ data.customer.renewal_date }}</dd>
</dl>
Use the Snippets next to the editor to insert a Value, Choice (a condition), or Repeat (a loop), and ready-made blocks such as Pairs, List, Table, Badge, and Button. The template can be up to 20,000 characters.
initdesk cleans the HTML before showing it. Scripts, event handlers, and styles don't run. Links work for http, https, and mailto addresses.
The test sends a real request to your endpoint using the current draft. It doesn't save or activate anything. The Panel tab shows what an agent would see, and the Response tab shows what your API sent back, with a Copy response button.
When the panel is on, the ticket sidebar shows a section named after your Heading. With no heading, it's named BYOD. It shows your template's output in full, with no need to expand it.
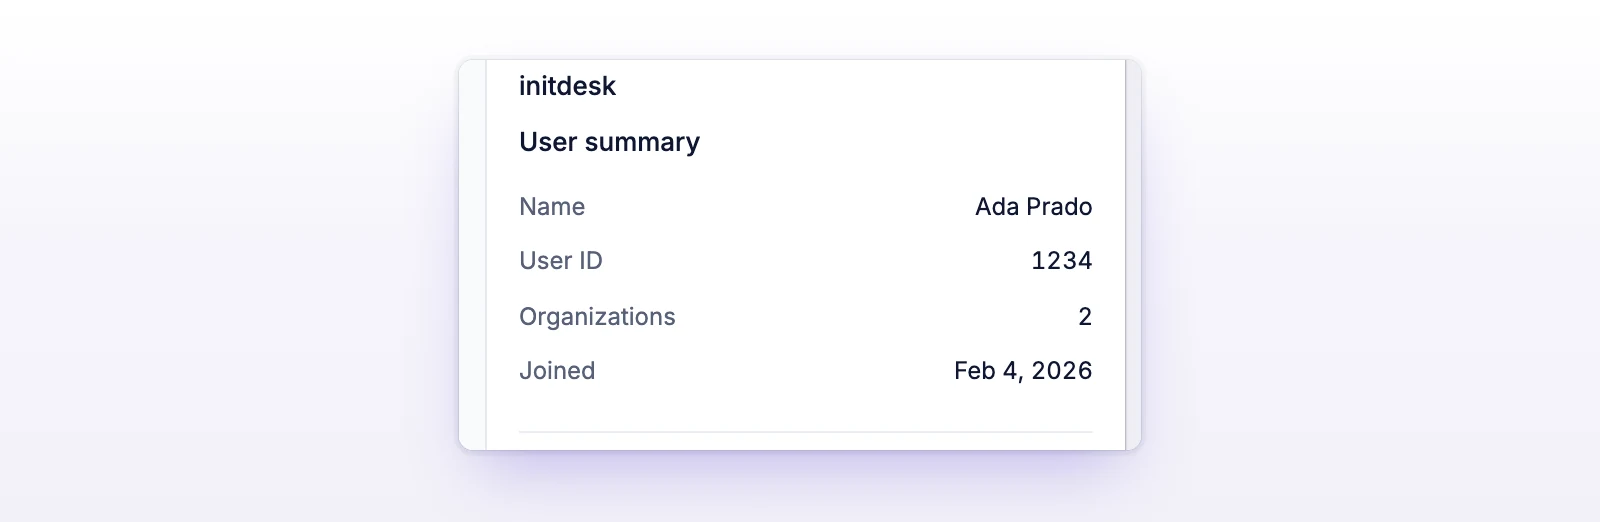
If your API fails, the section says "Customer data is unavailable" and offers Retry. The rest of the ticket works normally.
At the bottom of the page, select Remove connection and confirm Remove Bring Your Own Data?. The endpoint, headers, signing key, and template are deleted, and agents stop seeing the panel right away.
Raise Give up after (up to 10 seconds), or make your API faster.
Your API answered, but with nothing for that email. Test with an email you know exists.
Check that the response is a JSON object, and that the names in your template match it under data. Start with a very simple template.
Check that Show in ticket sidebar is on and that your API finds the real requester's email.